Read every print at every level. The Footprint is your primary lens — it tells you who has control of a price range, candle by candle.
What you're reading
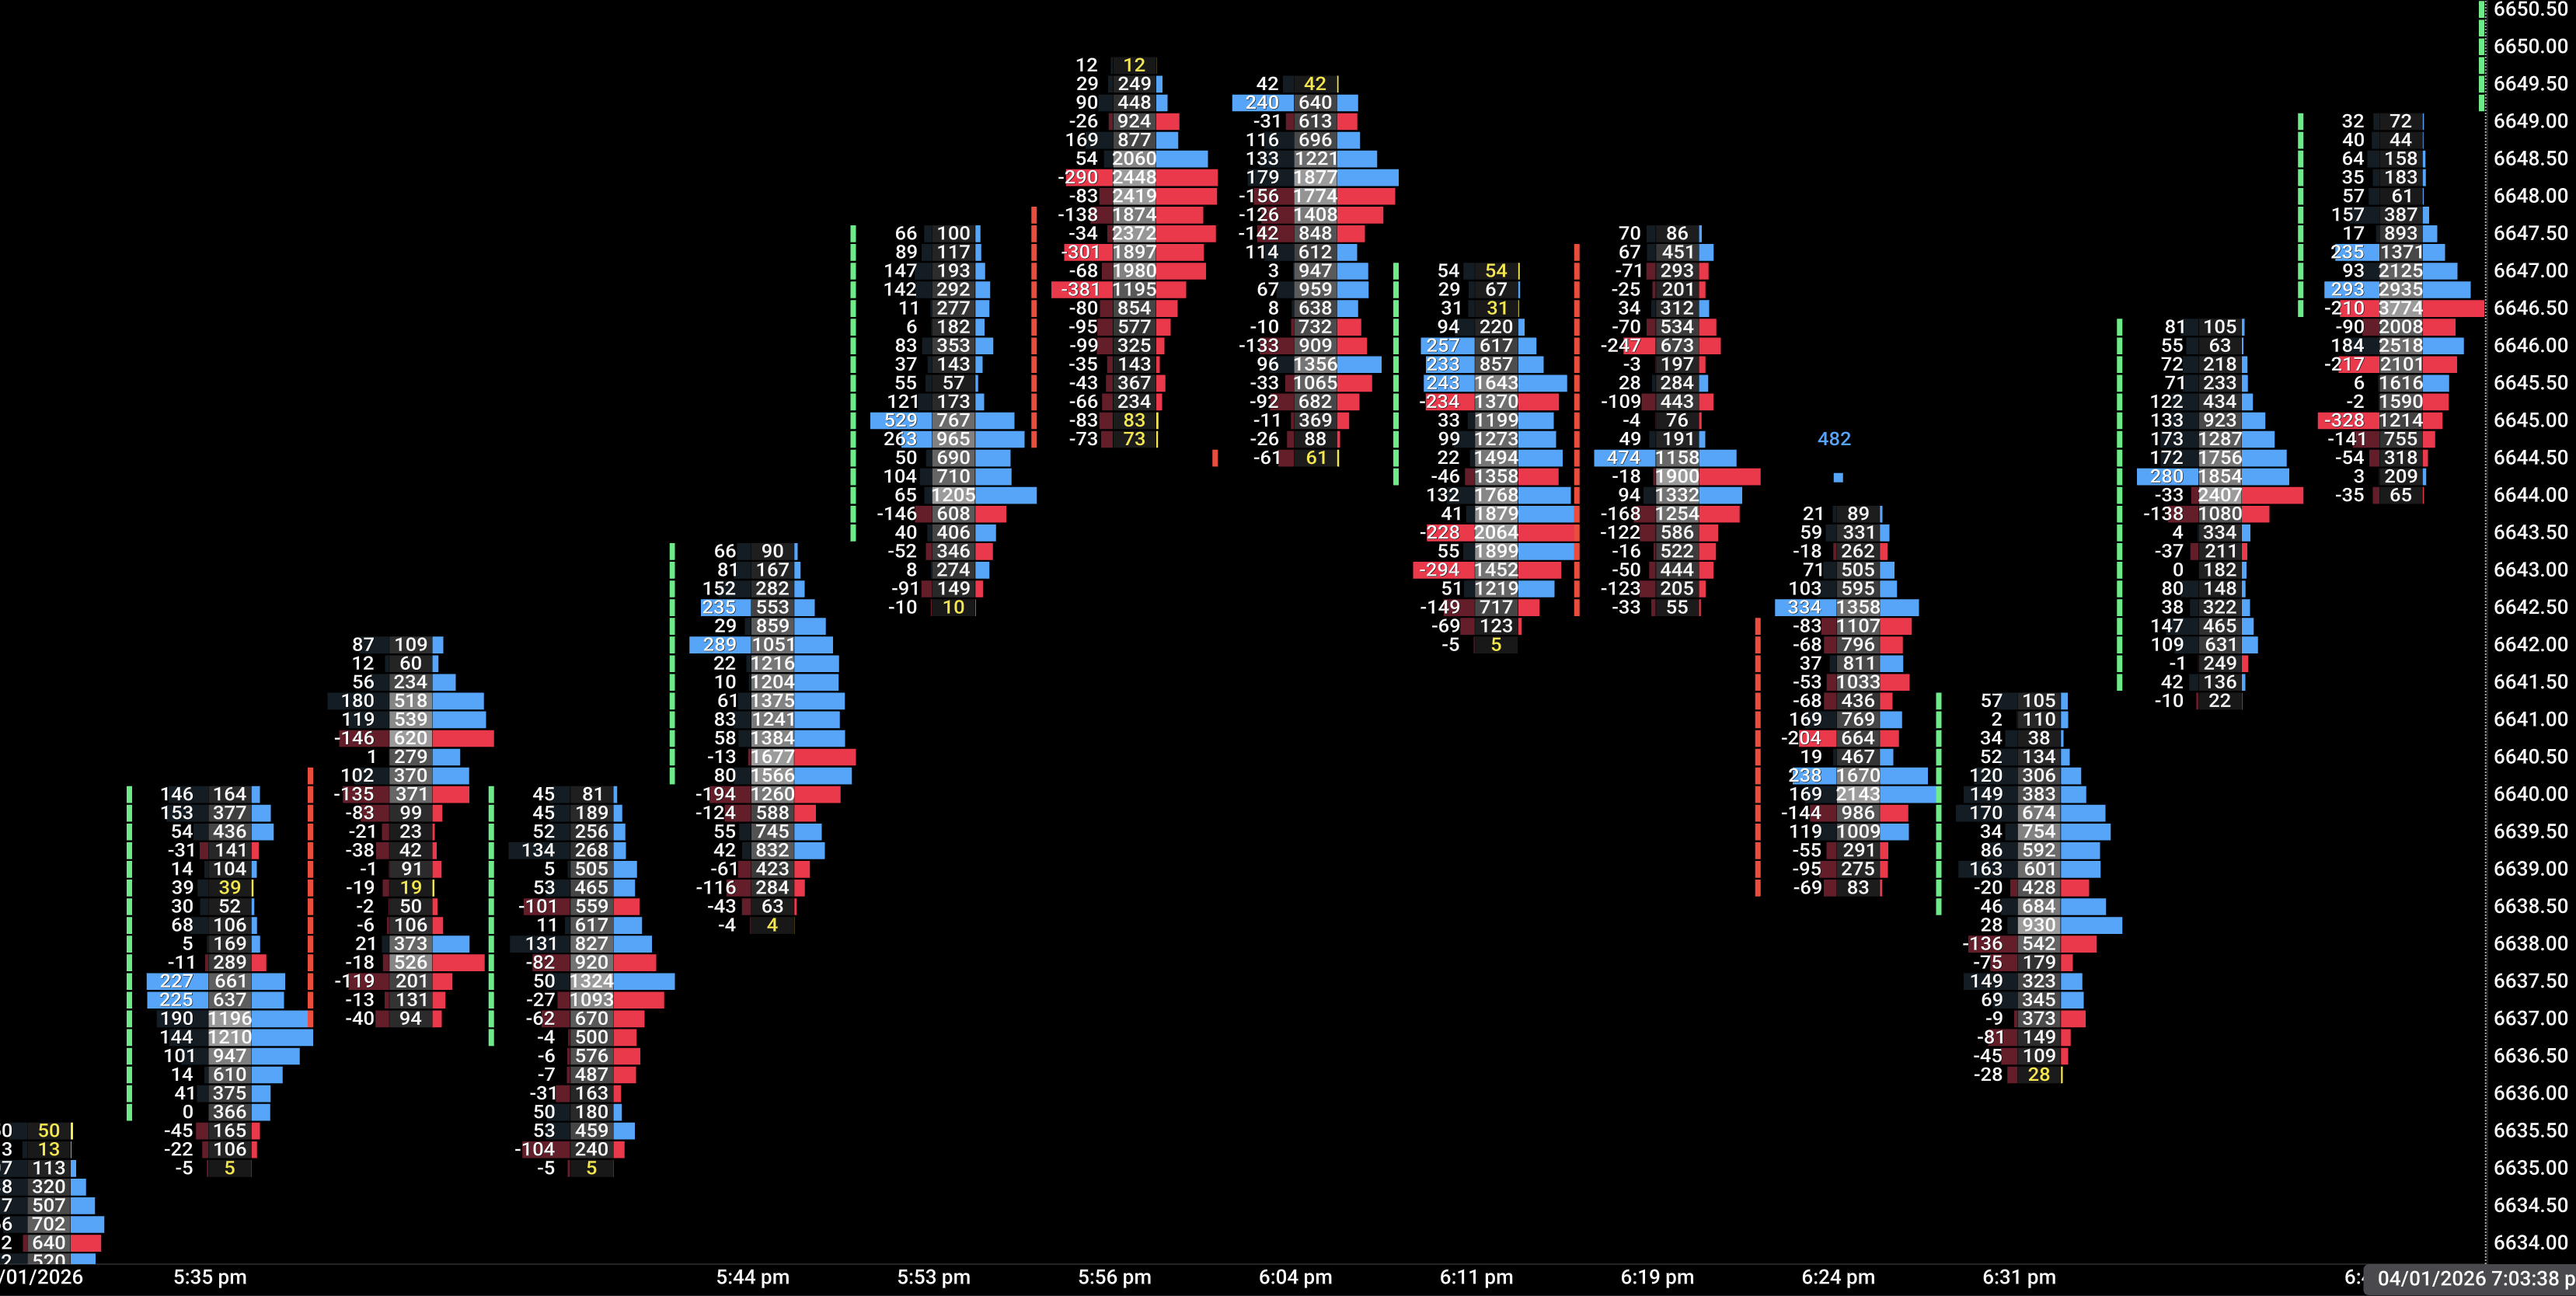
Each bar shows two columns per price level: bid (left) and ask (right). The difference is the delta — net buying or selling pressure at that specific price.
Trigger highlight — a level lights up when one side exceeds the other by your configured threshold. This is the clearest sign of aggression at a specific price.
VPOC — the price level with the highest traded volume inside the bar. Price tends to revisit this level.
Value Area (VAH/VAL) — top and bottom of the 70% volume concentration. Useful for reading where the real auction happened.
Absorption — a level shows high total volume but the delta stays near zero. Buyers and sellers are fighting hard — often a warning before a reversal.
Divergence — the candle closes up but the delta is negative (or vice versa). Hidden flow contradiction, a powerful signal to watch.
Confluence — what to stack
Footprint signal
Add this indicator
Result
Strong ask delta at key level
Flow Volume Profile — is this level inside the Value Area or at VAH?
High conviction long
Absorption (high vol, near-zero delta)
Flow Big Orders — are there large bubbles on this bar?
Potential reversal zone
Bearish delta divergence
Flow CVD — is CVD also rolling over?
Exit or fade setup
VPOC at session high
Flow Delta Axis — is delta profile POC also at high?
Distribution confirmation
Trigger highlight into imbalance zone
Flow Imbalance — is price reaching a projected zone?
Wait for zone reaction — don't chase
Trade scenarios
Breakout confirmation — buying the ask-dominated bar
SetupPrice tests a key resistance level (ORH, prior session VAH, or Imbalance zone upper boundary).
TriggerA bar closes above resistance with 3+ consecutive ask-dominant levels in the upper half of the bar. Trigger highlights visible.
ConfirmCVD is rising on the same bar. No absorption (delta stays clearly positive). Big Orders shows a teal bubble at the break level.
InvalidateNext bar closes back inside the range. Or absorption appears on the breakout bar (volume high, delta flat).
Absorption fade — reading trapped buyers
SetupPrice reaches a known supply zone (Imbalance zone, prior session VAH, or tested resistance level).
TriggerBar shows very high total volume at the zone with near-zero or negative delta — the ask is being absorbed. VPOC lands squarely in the zone.
ConfirmFollowing bar opens weak. CVD starts turning down. Delta Grid shows negative delta% on the next candle.
InvalidateThe next bar breaks cleanly above the zone with strong positive delta — the supply was cleared, not absorbing.
Divergence early warning — cutting a long
SetupYou're in a long, price is moving up but momentum feels thin on the tape.
TriggerFootprint shows a bullish-close candle with negative delta — sellers were net dominant even as price closed green.
ConfirmCVD is flat or declining. Effort indicator (if active) shows high volume, narrow range. Delta Grid shows low delta% on recent bars.
InvalidateNext bar shows strong positive delta with ask-dominant trigger highlights — the divergence resolved bullishly.
Key settings
Delta trigger threshold — ES: 100–200. NQ: 30–60. CL: 50–100. Start conservative and tighten as you learn the instrument's tempo.
Compact mode — Enable when you want more bars visible without losing the essential read. Hides the bid/ask numbers, keeps color coding and VPOC.
Value Area display — Keep ON for context. Disable only on very fast scalping setups where visual density is a problem.
Zero-print detection — Highlights levels with no trades. Useful for identifying vacuum zones price may skip through quickly.
Quick FAQ
Do I need tick data? Yes. Flow Footprint requires volume profile data (Tradovate Trader+ or higher plan).
Does it repaint? No. All calculations are from completed bar data. Nothing changes after a bar closes.
Can it run alone? Yes. It's a complete standalone tool. Adding Volume Profile and CVD elevates it significantly.
Lifetime or membership? Lifetime — one payment, permanent access.